Four short guides to the decisions that shape a kitchen or laundry room before a single appliance is chosen. General guidance, written plainly; your appliance’s installation instructions and your local code always come first.
Both cook beautifully. They differ in how heat reaches the pan, what they ask of the house, and how the kitchen feels while you cook.
How each one works
A gas burner heats the pan from below with an open flame. You can see the heat, judge it by eye, and use almost any pan, including a round-bottomed wok on the right grate.
An induction cooktop uses an electromagnetic field beneath a glass-ceramic surface to heat the pan itself. The glass warms only where the hot pan sits on it, and heat stops almost the moment the pan is lifted or the zone is turned down.
What changes in the kitchen
Speed and control. Induction brings water to a boil quickly and holds a very low simmer steadily. Gas responds instantly too, with the advantage of a flame you can read.
Cookware. Induction needs magnetic cookware. If a fridge magnet holds firmly to the base of a pan, it will work. Cast iron and most stainless steel qualify; plain aluminum, copper and glass do not.
Heat in the room. Induction puts far less waste heat into the kitchen, which is welcome through a long Gulf Coast summer.
Air. Gas burners produce combustion byproducts as well as cooking fumes, so a properly ducted hood matters even more. Induction still needs ventilation for smoke, steam and grease.
Cleaning. Induction is a flat sheet of glass. Gas means grates, caps and burner heads.
What each asks of the house
Induction cooktops and ranges generally need a dedicated 240-volt circuit; the required amperage varies by model and is listed in its installation guide. Gas needs a natural gas or propane supply with a shutoff, and a propane installation needs the appliance converted for propane. If the house has only one, that often settles the question, or tells you what an electrician or plumber will need to add.
Side by side
Induction
Gas
Heat source
Electromagnetic field heats the pan directly
Open flame beneath the pan
Cookware
Must be magnetic
Nearly anything, including woks
Utility
Dedicated 240-volt circuit, sized per model
Natural gas or propane line with shutoff
Heat into the room
Low
Higher
Ventilation
Needed for smoke, steam and grease
Needed, and more important
Cleaning
Flat glass surface
Grates, caps and burners
If you love cooking over a flame, choose gas and ventilate it well. If you value speed, steady low heat and a cooler kitchen, induction rewards the switch.
Field Note 02 · Ventilation
Sizing ventilation to your cooktop
A hood should be chosen for the cooking beneath it. Three things matter most: how wide it is, how much air it moves, and the path that air takes outside.
Width first
A hood should be at least as wide as the cooking surface. Rising heat and smoke spread as they climb, so a hood a few inches wider on each side captures more, and island hoods, with no wall to contain the plume, benefit from the extra width most. Mounting height matters too: most manufacturers specify a range above the cooking surface for each model. Follow the one for yours.
Then airflow
Airflow is rated in cubic feet per minute (CFM). The figures below are widely used starting points, not rules. The appliance manufacturers’ recommendations and your own cooking habits should adjust them.
Common rules of thumb
Situation
Starting point
Example
Gas range or cooktop
About 100 CFM for every 10,000 BTU of combined burner output
Duct it if you can. A ducted hood removes heat, moisture and fumes from the house. A recirculating hood filters grease and some odor and returns the air to the room; it is a compromise, especially over gas.
Keep the run short. Use the duct size the hood’s instructions specify, with as few elbows as possible. Every turn and every extra foot reduces what the fan can deliver.
Plan for makeup air. Exhausting air means replacing it. Many local codes based on the International Residential Code require makeup air for kitchen exhaust systems rated above 400 CFM. Ask your local building official early, because it affects the mechanical plan.
Know the limits of downdrafts. Downdraft vents solve the problem of an island without a ceiling hood, but they struggle to capture steam from tall stockpots.
General guidance only. The installation instructions for your hood and cooktop, and your local code, take precedence over any rule of thumb.
Field Note 03 · Laundry
Planning a laundry room
A good laundry room is mostly invisible work: water in, water out, power, air, and enough space to stand and fold.
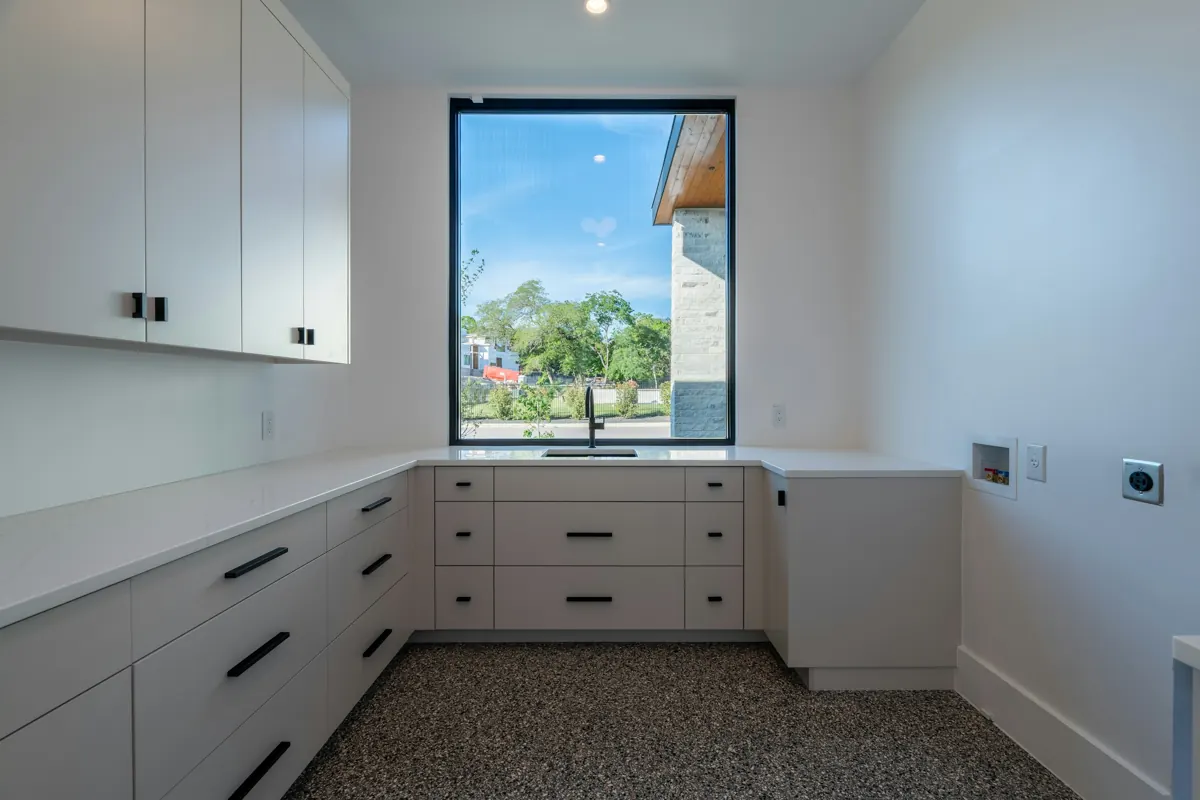
Pl. 14Before the machinesA finished laundry room awaiting its pair: the recessed water box and the dryer receptacle are already in the wall at right.
Where it goes
Near the bedrooms saves carrying; near the kitchen or mudroom keeps noise and water on the ground floor. If the room sits above living space, plan a drain pan beneath the washer and consider a leak sensor and valves that are easy to close.
Utilities
Water and drain. Hot and cold supply valves and a standpipe or recessed laundry box, at the heights the washer’s instructions call for.
Power. A 120-volt outlet for the washer. An electric dryer needs a 240-volt receptacle that matches its cord; a gas dryer needs a 120-volt outlet plus a gas supply with a shutoff.
Venting. A vented dryer needs a duct to an exterior hood with a damper. Rigid or semi-rigid metal duct, kept short and straight, dries faster and collects less lint. Clean the lint screen every load and the duct periodically.
No vent possible? A heat-pump dryer needs no exterior duct. It usually drains through a hose to the standpipe or into a container you empty.
Space
Side-by-side full-size machines generally need roughly five feet of clear width; check the specification sheets for your exact pair. Allow depth for the machines plus a few inches behind for hoses and the dryer connection, and room in front for the doors to open fully while you stand there with a basket.
Front-load washers spin hard, so a level, solid floor matters. Pedestals raise the doors to a kinder height. A counter over side-by-side machines gives you a folding surface; leave a way to slide the machines out for service.
The finishing details
A sink for soaking and hand-washing, if space allows.
A hanging rod for shirts that should not see the dryer.
Good overhead light, and task light over the folding counter.
Closed storage for detergents, out of reach of small children.
Field Note 04 · Refrigeration
Integrated or freestanding
The refrigerator is the largest appliance in most kitchens. How it meets the cabinetry is one of the earliest decisions in a design, and one of the hardest to change later.
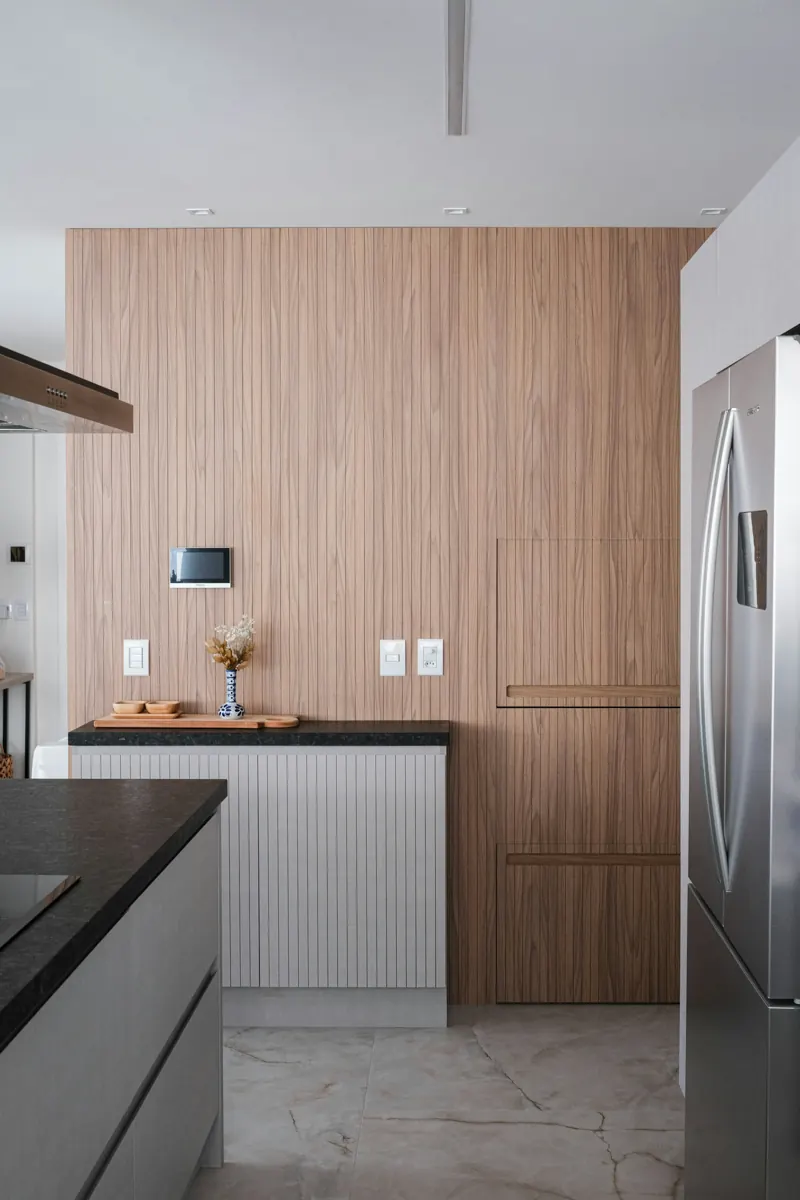
Pl. 15Two answers, one wallWalnut panels with recessed pulls at left; a freestanding French-door refrigerator at right.
Three approaches
Freestanding. Finished on the sides and made to stand in an opening. Standard-depth models stand proud of the counters; counter-depth models sit closer to the line of a standard 24-inch-deep counter. Easiest to install and to replace.
Built-in. Designed to sit flush with the surrounding cabinetry, usually with a finished stainless or glass front, and sized to fit standard built-in openings.
Fully integrated. Panel-ready units that take custom cabinet fronts and disappear into the run. Columns let you separate refrigerator, freezer and wine into individual units and arrange them as you like.
What integration asks for
Exact openings. Integrated units are installed to the manufacturer’s cutout dimensions, so the cabinetry must be drawn and built around the chosen model.
Panels to specification. Your cabinetmaker builds the doors to the maker’s limits for size, thickness and weight.
Air. Built-in and integrated units breathe through a grille at the toe kick or top. Do not block it with trim.
Anchoring and swing. Tall units are secured to the wall, and door swing must clear adjacent walls, islands and drawers.
How to decide
Choose freestanding when flexibility and simpler installation matter most, or in a kitchen you may change again. Choose built-in or integrated when the refrigerator should read as part of the architecture and the cabinetry is being designed now. Whichever you choose, decide before the cabinet drawings are final.
If you are unsure, send us the cabinet drawings. We will mark the openings each option requires.
Questions
Ask about your room
Guides are general. Your kitchen is specific. Write to us with the details and we will answer for your space.